When you live by the coast, sun, salt air, and sea breeze aren’t just a mood—they’re forces of nature that shape how your home looks and how long paint lasts. In this guide, we’re showcasing Manhattan Beach painting before-and-after photos, along with the color moves, prep steps, and finish choices that make local homes look fresh for longer.
For more local context and estimates, explore our page featuring Manhattan Beach painting before-and-after photos—we’ll reference it throughout this article with quick links where helpful.
What “Before & After” Really Shows (Beyond Pretty Pictures)
A great “after” photo isn’t just about color. It usually means:
- Thorough surface prep: repairs, sanding, caulking, and priming
- Smart product selection for UV resistance and salt-spray exposure
- Right sheen in the right room for light bounce and wipeability
- Clean lines and cut-ins that make colors read crisp.
- Consistent coverage so the tone looks even in bright coastal light.
These are the steps that separate a quick coat from a true transformation.
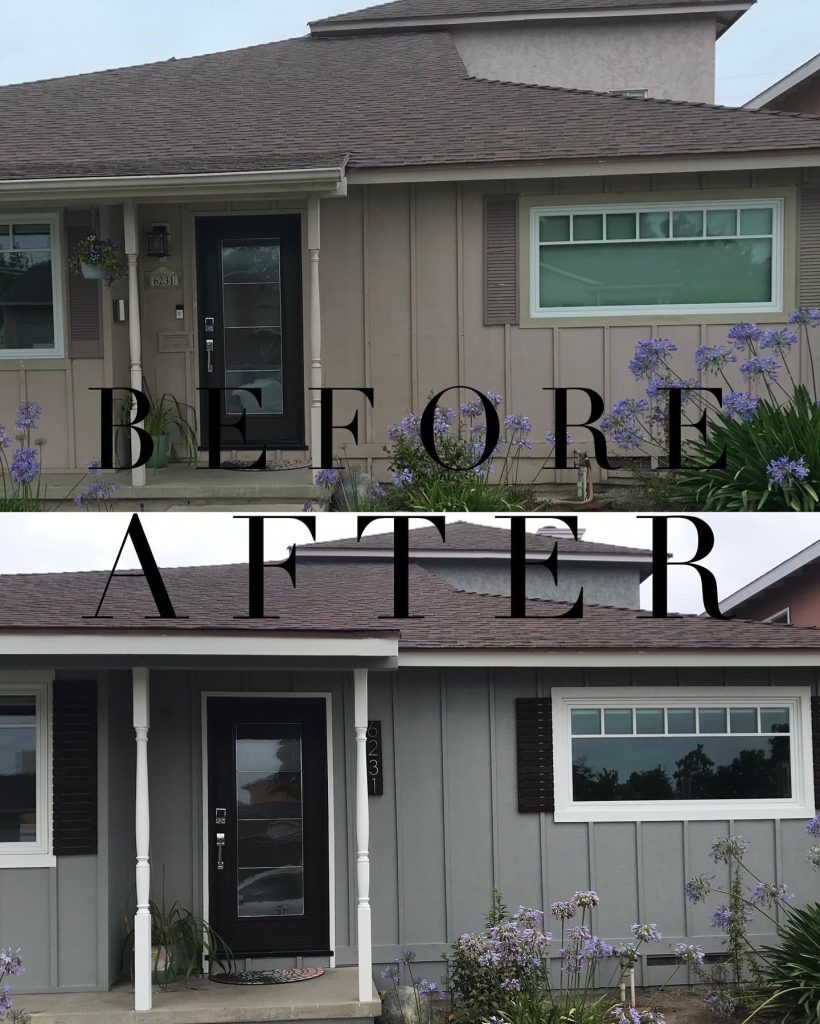
Exterior Transformations: From Sun-Faded to Curb-Appeal Strong
Coastal sun can wash out colors and chalk cheaper paints fast. When planning an exterior repaint in Manhattan Beach, consider the importance of longevity and contrast.
Typical “before” clues
- Chalking and fading on south- and west-facing walls
- Hairline stucco cracks that show through lighter paints
- Swollen or splitting trim from salt-air moisture
- Rust bleeds on metal railings, light fixtures, or fasteners.
What the “after” looks like
- Stucco is sealed and primed, with cracks bridged, so the color appears smooth and uniform.
- UV-tough topcoats that keep whites crisp and darks rich
- Trim sharpened with a slightly higher sheen to frame the façade.
- Railings and metal accents treated with rust-inhibiting primers
Color ideas that play well with the Manhattan Beach vibe
- Soft white + warm greige trim for a modern coastal cottage look
- Driftwood taupe + bright white for beachy neutrals that hide sand dust
- Cool graphite + white for a contemporary, architectural edge
- Muted sage or sea-glass blue accents on doors for character
Pro tip: For stucco near the ocean, use stronger pigments and high-quality resins to combat fading. On wood trim, a satin or semi-gloss adds durability and subtle pop without glare.
Interior Transformations: Light, Balance, and Bolder Accents
Manhattan Beach homes run the gamut—bungalows, modern builds, townhomes. Interiors benefit from paint that balances abundant daylight with calming undertones.
Common interior “before”
- Yellowed whites from age or older oil paints
- Patchy touch-ups that show in the afternoon sun
- Rooms that feel flat because everything is the same sheen
Interior “after” you’ll notice
- Cohesive neutral base (think soft white, pale greige, or oatmeal) to unify open layouts
- One accent wall or color-blocked niche to shape the room
- Sheen strategy: eggshell on walls for wipeability, flat on ceilings for depth, satin on trim for crisp edges
Palette starters
- Warm white walls + soft black interior doors = instant modern balance
- Pale greige living spaces + powdery blue bedroom = serene coastal flow
- Creamy white kitchen + muted clay dining accent = warm, relaxed hosting
Lighting check: In MB, morning marine layer softens tones; afternoon sun intensifies them. Always view large samples at different times of day before finalizing your decision.
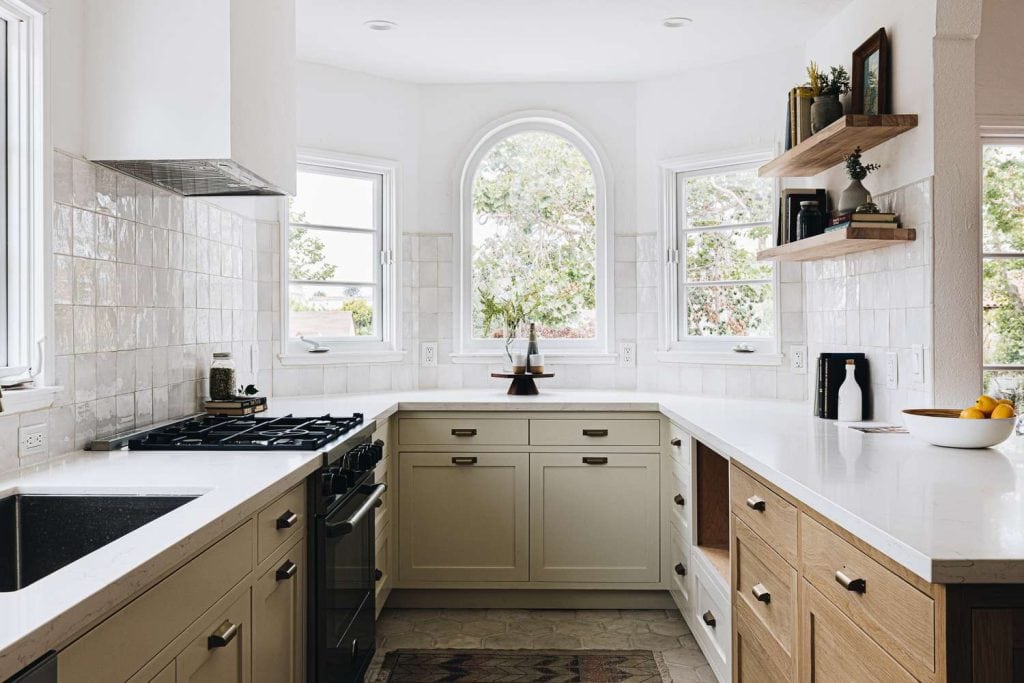
Cabinet Painting Before & After: A Kitchen’s Fastest Flip
Cabinet painting is where “before & after” feels almost magical.
Before
- Orange or red-toned woods that dominate the space
- Nicks at edges and worn high-touch zones near pulls
- Visual clutter from mixed finishes
After
- Degreased, sanded, and filled doors with a firm, factory-like feel
- Spray-smooth enamel finishes that level out brush marks.
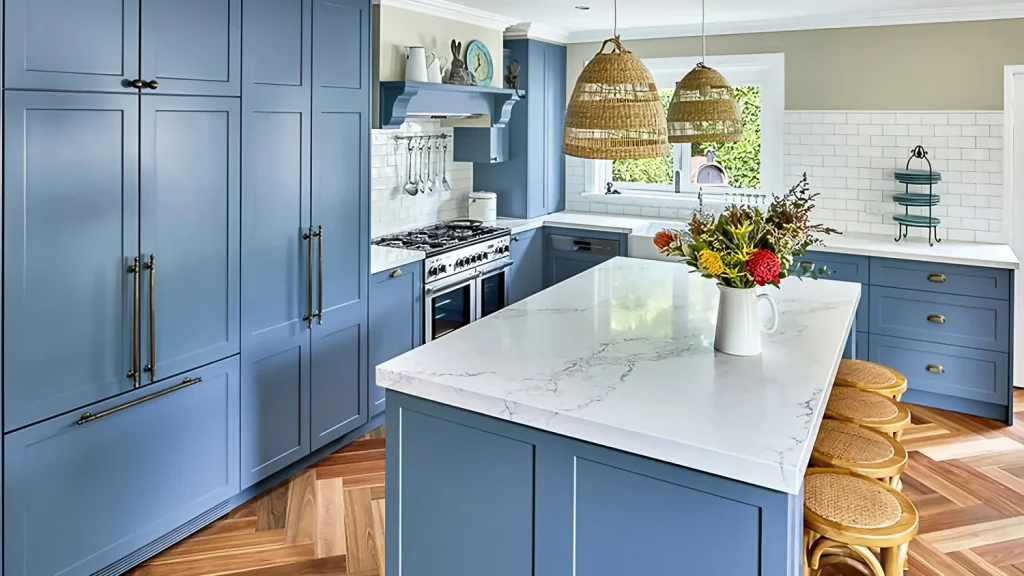
- Two-tone kitchens (e.g., white uppers, deeper island) to add dimension
Colors that thrive in MB light
- Soft white uppers with harbor gray lowers
- Cafe latte beige with brushed brass hardware
- Dusty green with matte black pulls for a coastal-modern mix.
Durability note: High-quality cabinet enamel and proper curing time lead to a finish that resists chips, fingerprints, and moisture. The “after” photos remain beautiful because the coating stays in place.
Epoxy Garage Floors: The Unsung Before & After
While not a “wall” project, an epoxy floor coating can deliver a dramatic visual upgrade.
Before
- Oil stains and concrete dusting
- Uneven color and hairline cracks
After
- Diamond-ground prep for adhesion
- Flake blends that conceal dirt and provide a light bounce.
- High-build clear coats for a clean, showroom look
A brighter garage often becomes a fitness space, surfboard zone, or storage area that actually invites you in—great for an active Manhattan Beach lifestyle.
Prep Makes the Picture: What Happens Between “Before” and “After”
Even the best color can fall flat without proper preparation. Here’s the behind-the-scenes flow that makes those photos pop:
- Assessment & protection — note repairs, protect landscaping, mask cleanly
- Repairs — patch stucco/wood, sand, fill, and prime stains
- Caulking & sealing — especially at coastal joints, windows, and trim
- Priming for substrate — stucco vs. wood vs. metal needs tailored primers
- Topcoats — the right product line, sheen, and number of coats for coverage
- Detailing — lines, hardware, fixtures, and cleanup for crisp presentation
That’s why “after” images feel calm: surfaces are corrected, not just covered.
The Power of Sheen in Coastal Light
Sheen is a quiet hero of every transformation:
- Flat/Matte hides texture on ceilings and low-traffic walls
- Eggshell balances wipeability with a gentle glow for living spaces
- Satin adds durability where hands meet surfaces (doors, trim, cabinets)
- Semi-gloss enhances contrast on trim and built-ins, creating a clean frame.
Under the strong Manhattan Beach sunshine, a touch more sheen on trim and doors helps edges stand out in photos and real life.
Color Planning: Micro-Moves That Maximize “After” Photos
- Contrast the right things. Keep walls calm; highlight doors, shutters, or beams.
- Cool vs. warm whites. Warm whites flatter wood and brass; cool whites flatter chrome and concrete.
- Door drama. A bold front door (in teal, ink, or brick red) can redefine curb appeal without requiring a full exterior paint job.
- Monochrome moments. One color in different sheens on walls, trim, and cabinetry creates depth without crowding the palette.
- Sample in scale. Brush big patches or use stick-on sheets; view in the morning, noon, and late afternoon.
Manhattan Beach Maintenance Timeline (So “After” Stays After)
Coastal conditions push a faster maintenance cycle:
- Exteriors: plan on touch-ups every 2–3 years, full repaints at 5–7 years, depending on exposure
- Trim & doors: check annually for hairline cracks; spot-prime and seal early
- Interiors: high-touch areas (hallways, kids’ rooms) may need a refresh every 3–5 years
- Cabinets: wipe with non-abrasive cleaner; avoid soaking hardware zones
- Epoxy floors: mild soap, no harsh solvents; soft wheels on heavy gear
A little upkeep keeps your “after” looking like day one.
Real-World Scenarios (What the Camera Captures)
1) 1960s beach bungalow exterior
- Before: Blanched stucco, peeling fascia, rust at gate hardware
- Afterward: Warm white stucco, satin graphite trim, and a sealed gate with a rust-inhibiting primer — the house now has crisp edges and balanced contrast.
2) Open-plan living room
- Before: Yellowed flat paint, scuffs on corners
- After: Soft white eggshell on walls, flat ceiling, satin trim—light now bounces evenly and corners read clean.
3) Kitchen with heavy wood cabinets
- Before: Orange tone steals the show, the room looks small
- After: Two-tone enamel (white uppers, harbor-gray lowers), updated pulls—space feels larger and lighter.
4) Primary bath refresh
- Before: Semi-gloss everywhere reflecting too much light
- After: Matte walls with satin vanity, mirrors softened—no more glare, just glow.
Key Benefits of a Professional Repaint (At a Glance)
| Benefit | What You See in Photos | Why It Lasts |
| Stronger prep | Smooth, even color; no telegraphed cracks | Sealed substrates resist moisture and salt air |
| Better lines | Sharp trim edges and tidy cut-ins | Skilled masking and steady application |
| Right coatings | Richer color that holds | UV-resistant, marine-aware formulas |
| Sheen strategy | Balanced light, less glare | Finish matched to traffic and light |
| Local know-how | Palettes that vibe with MB | Choices tuned to coastal weather |
How to Plan Your Own Before & After (Step-by-Step)
- Set the vibe. Pull 6–8 inspiration images that feel like your home.
- Walk-through check. Note repairs, sun-facing sides, and traffic zones.
- Pick 2–3 palettes. Try warm, cool, and neutral families so you can compare.
- Sample large. Paint or apply 12″×12″ (or larger) samples and study them at three times of day.
- Choose sheens. Walls, trim, cabinets, doors—each gets a purpose-driven finish.
- Schedule prep. Allow time for repairs, priming, and masking—rushing shows up in photos.
- Plan the photo. Tidy, stage lightly, and shoot from the same angles for true before/after impact.
For local help, see Manhattan Beach painting before-and-after photos and connect for a quick estimate.
Common Mistakes (That Make “After” Underwhelm)
- Skipping primer on stained wood or patched stucco
- One-sheen fits all inside, leading to glare or flatness.
- Too many accent colors—visual noise kills the calm
- Ignoring hardware and fixtures that date the look in photos
- Not caulking joints on exteriors before painting.
A little planning can avoid these traps and keep the reveal clean.
Photo Tips to Capture Your Transformation
- Same angle, same time of day for both shots
- Declutter (edit surfaces, hide cords, keep décor simple)
- Use natural light first, then add balanced artificial light if necessary.
- Use a tripod or phone stand for consistency.
- Wipe lenses and shoot wide, then grab a few detail close-ups (corners, trim, sheen)
You’ll be amazed at how professional your “after” looks with a few easy tweaks.
Why Manhattan Beach Homes Benefit Most from Strategic Paint Choices
- UV intensity demands pigments and resins that keep tones true
- Salt air subtly weathers metals and wood—primers and caulk matter.
- Open-plan living loves neutral bases with curated accents.
- Active lifestyles (beach, bikes, boards) call for wipeable finishes inside and tougher coatings outside.
When your products, prep, and palette match the environment, the after-effects—on the wall and on camera —last.
Ready to See Your Own Before & After?
If you’re planning a project, start with a quick walk-through and a few large color samples. For location-specific guidance, check out Manhattan Beach painting before-and-after photos and reach out—we’ll help turn your ideas into a photo-worthy reveal.
FAQs
1) How long does a typical Manhattan Beach exterior repaint take?
Most single-family exterior projects take about a week to complete, depending on the complexity of the repairs, masking, and weather conditions. Homes with extensive trim or stucco repairs can take longer, but planning and steady sequencing keep things smooth.
2) What’s the best white for a bright, beachy interior?
There’s no single winner. In strong sun, a warm white avoids looking sterile; in shaded rooms, a neutral white keeps things calm. Always sample a large amount and view it at different times of day.
3) Which sheen should I choose for trim and doors?
Satin or semi-gloss finishes add durability and define edges in photos. Satin is softer and forgiving; semi-gloss is crisper and more reflective—great for modern contrast.
4) How often will I need to repaint the outside?
Expect touch-ups every 2–3 years and a full repaint around 5–7 years, depending on exposure and product choice. Coastal conditions can nudge the timeline—routine checks are helpful.
5) Can cabinet painting really look factory-smooth?
Yes—when doors are degreased, sanded, filled, and sprayed with quality enamel and allowed to cure properly. The result feels tight and cleans easily, holding up for years to come.

David Cooley, the esteemed owner of Cooley Brothers Painting, has established himself as a leading figure in the painting industry. With a rich history of delivering unparalleled service in Torrance, Manhattan Beach, Palos Verdes Estates, Redondo Beach, and Rolling Hills, his hands-on approach and dedication to quality have shaped Cooley Brothers Painting into a trusted name for exceptional painting services. With a focus on innovation, customer satisfaction, and community engagement, David’s leadership continues guiding his team toward new heights of excellence and reliability in every project.