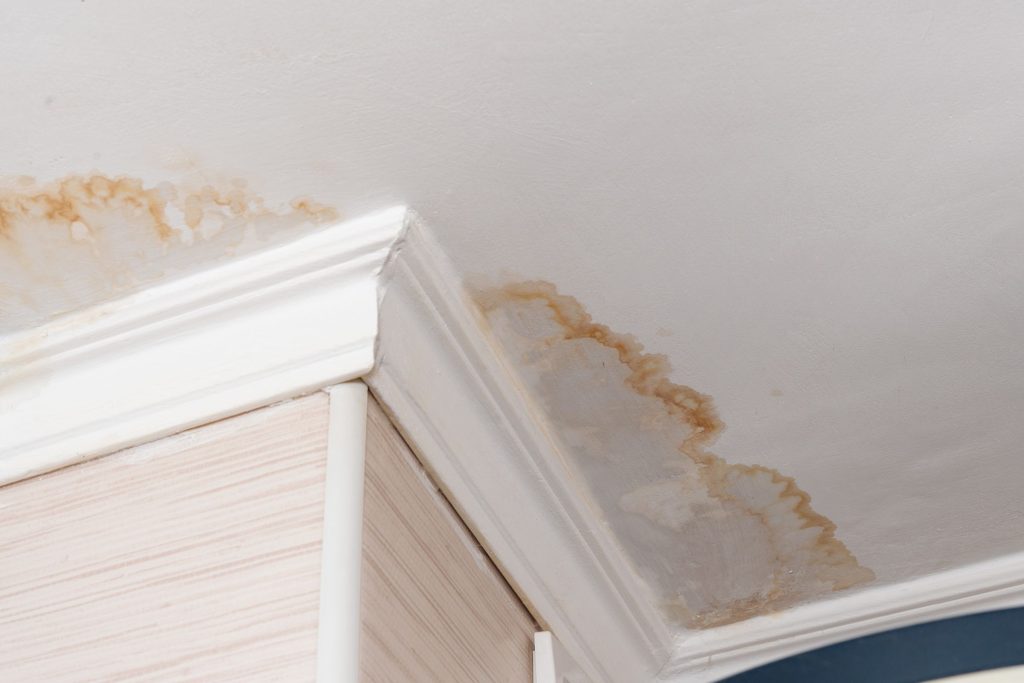
A ceiling water stain can make an otherwise clean room look neglected in a hurry.
It draws the eye right away.
Even worse, many homeowners try to paint over it too quickly, only to watch the stain bleed back through the fresh coat days or weeks later.
That is why learning how to paint over water stains on ceiling surfaces properly matters so much. The goal is not just to hide the stain for the moment. The goal is to stop the cause, prepare the ceiling properly, use the right products, and make sure the repair actually lasts.
In some cases, this is a manageable project.
In others, the stain is only the visible part of a much bigger issue.
If the leak is active, the drywall is sagging, the damage is spreading, or there are signs of mold or repeated moisture exposure, painting alone is not the answer. That is when it makes sense to step back and bring in a professional.
This guide breaks down what ceiling water stains really mean, how to address them correctly, and when the problem has moved beyond a simple repaint.
Why You Should Never Paint Over a Water Stain Right Away
The biggest mistake homeowners make is rushing to cover the mark.
It seems logical.
If the stain is ugly, paint it.
But water stains are different from ordinary scuffs, scratches, or color changes. They often contain residue that can push through regular paint even after the ceiling looks dry. If the source of the stain is not addressed first, the mark may return, spread, or cause new damage.
That is why understanding how to paint over water stains on ceiling areas starts with one basic rule.
Do not paint until you know the leak or moisture source has been handled.
A stain can come from a roof issue, a plumbing problem, an upstairs bathroom leak, condensation, or repeated moisture buildup. If that source is still active, the stain will only come back. In some homes, the affected area may even widen over time.
Fresh paint cannot solve an active water problem.
It can only hide it briefly.
Step One: Find Out What Caused the Stain
Before you think about primer or paint, you need to know where the stain came from.
That part matters more than the paint itself.
Ceiling stains can come from several common sources:
- Roof leaks
- Plumbing leaks
- HVAC condensation
- Bathroom moisture
- Upstairs fixture overflows
- Repeated humidity buildup
Some stains are old and fully inactive.
Others are recent.
Some are one-time issues that were already fixed. Others are warnings that the real problem is still happening above the ceiling.
If you are not sure whether the leak is active, look for clues.
Is the stain darker after rain?
Does it grow over time?
Is the paint bubbling?
Is the drywall soft?
Do you notice a musty smell?
These signs suggest the issue may still be live, which means painting should wait until the source is corrected.
This is the first real step in learning how to paint over water stains on ceiling surfaces the right way.
You have to solve the moisture issue before you solve the appearance issue.
Step Two: Make Sure the Ceiling Is Fully Dry
A stain may look dry on the surface but still hold moisture underneath.
That is a problem.
If you paint over a damp area, you can trap moisture, weaken adhesion, and set the stage for later peeling, bubbling, or stain bleed. A ceiling needs enough time to dry fully before any repair or coating work starts.
How long that takes depends on the size of the affected area, how much water got in, what caused it, and how well the room ventilates.
A very small, old stain may already be dry.
A larger stain from a recent leak may need much longer.
If the drywall still feels cool, soft, swollen, or slightly spongy, it is not ready. If the texture is distorted or the ceiling has begun to sag, drying alone may not be enough. The material itself may need repair or replacement.
When people search for how to paint over water stains on the ceiling, they often focus on choosing the right product first.
But timing is just as important.
A dry ceiling gives you a chance at a lasting result.
A damp one does not.
Step Three: Check Whether the Ceiling Material Is Still Sound
Not every stained ceiling can simply be primed and painted.
Some need repair first.
If the damage is minor and the drywall or plaster is still intact, you may be able to clean, seal, and repaint the area. But if the ceiling is cracked, crumbling, sagging, or water-softened, the stained section may no longer be stable enough for a cosmetic fix.
Look closely at the area.
Do you see bubbling paint?
Peeling layers?
Soft spots?
Loose tape joints?
Warped texture?
Any of those signs can indicate that the surface needs more than just stain-blocking primer and ceiling paint. In those cases, patching, skim coating, texture repair, or partial ceiling replacement may be needed before painting begins.
That is an important part of understanding how to paint over water stains on ceiling surfaces correctly.
The stain is not always the main problem.
Sometimes the real issue is what the water did to the material underneath.
Step Four: Clean the Stained Area Before Priming
Once the source is fixed, the ceiling is dry, and the surface is sound, the next step is preparation.
That means cleaning.
A water stain can leave behind discoloration, residue, dirt, and minerals that interfere with the adhesion of primer and paint. If you skip cleaning, you increase the chance that the stain will bleed through or that the finish will look uneven.
A light cleaning is often enough.
The goal is not to soak the ceiling again.
It is to remove surface residue and leave the area ready for coating. After cleaning, let the area dry again fully before moving to the next step.
This stage may feel small, but it plays a major role in how well the stain-blocking system works.
If you want to know how to paint over water stains on ceilings without the marks returning, proper prep is non-negotiable.
Step Five: Use a Stain-Blocking Primer, Not Just Regular Paint
This is where many DIY projects go wrong.
Regular ceiling paint is usually not enough to stop a water stain from showing through. Even a good-quality paint may fail to block the discoloration if there is no proper primer underneath.
That is why stain-blocking primer matters.
It creates a barrier between the old stain and the new finish coat. Without that barrier, yellow or brown marks often reappear through fresh paint. Homeowners sometimes think they need more coats of paint when the real issue is that they skipped the right primer.
So if you are looking up how to paint over water stains on the ceiling, remember this clearly:
You are not just repainting.
You are sealing the stain first.
The stain-blocking step is what gives the final paint a chance to look clean and stay clean.
Why Spot Priming Can Still Show a Flashing Effect
Even when the stain is sealed properly, some ceilings still look uneven afterward.
That can happen when only the stained patch is primed and painted, while the rest of the ceiling remains untouched.
The repaired section may have a slightly different sheen, texture, or visual density than the surrounding area. In certain lighting, that difference becomes obvious even if the stain itself is gone.
This is often called flashing.
It is especially noticeable on ceilings because light tends to rake across them in broad, flat angles.
That is why a good approach is not just about blocking the stain.
It is also about how to blend the final finish.
In many cases, the best visual result comes from priming the stain but painting the entire ceiling plane so the sheen and color look consistent.
That extra step often makes the difference between a repair that disappears and one that still catches the eye.
Step Six: Choose the Right Ceiling Paint
Once the primer has done its job, the finish coat matters too.
Ceiling paint is not the same as wall paint.
It is often chosen for better overhead application, lower spatter, and a flatter finish that helps hide minor surface imperfections. Using the wrong product can make the repaired area stand out more than necessary.
A ceiling with previous water damage may already have slight texture or surface variation.
That makes product choice more important.
If the goal is a clean, uniform look, the finish coat should support that. A mismatched sheen can make the patch easier to notice, even if the stain no longer shows through.
When thinking about how to paint over water stains on ceiling surfaces, the real process is layered:
Fix the source.
Dry the area.
Repair the surface.
Clean it.
Prime it.
Then repaint it properly.
Skipping straight to the last step is what usually causes disappointment.
Should You Paint Just the Stain or the Whole Ceiling?
This is one of the most common questions homeowners ask.
Technically, you can often treat and repaint only the damaged section.
Visually, that doesn’t always yield the best results.
Even if the color is the same on paper, an older ceiling may have changed slightly over time. Dust, age, previous roller texture, and room lighting can all make a fresh patch stand out. That is especially true if the stain was large or located in a central part of the room.
So while the stain itself may only cover a small spot, painting the full ceiling often produces a more even result.
It looks cleaner.
It blends better.
And it reduces the chance of a visible patch effect.
If you are trying to decide how to paint over water stains on ceiling areas in a way that actually looks finished, this is an important consideration. The smallest repair area is not always the best-looking repair area.
When a Water Stain Means More Than a Paint Problem
Some stains are cosmetic.
Others are warnings.
A small, old stain from a one-time issue may be a straightforward paint project. But a recurring stain, a large brown ring, a bubbling texture, or a sagging section of drywall often points to deeper trouble. At that stage, the paint question becomes secondary.
You may be dealing with:
- hidden moisture above the ceiling
- damaged drywall or plaster
- repeated leak activity
- compromised tape joints
- mold growth
- larger repair needs than expected
That is why homeowners should not treat every stain as a simple cover-up job.
Sometimes the ceiling is telling you something important.
Learning how to paint over water stains on ceiling surfaces also means learning when not to paint.
Signs You Should Call a Pro
There comes a point where doing it yourself may create more work than it saves.
If any of these are true, it is smart to call a professional:
The stain keeps coming back
If the discoloration returns after drying periods or changes with the weather, the water source may still be active.
The ceiling feels soft or sags
Soft drywall, sagging areas, or visible bulging are signs that the material may be compromised.
The damage is large
A larger stain often indicates more moisture was involved, increasing the risk of hidden damage above the visible mark.
There is peeling, cracking, or bubbling
This suggests that the water affected not just the color, but also the integrity of the surface layers.
You suspect mold or a strong odor
A musty smell or dark recurring growth should not be treated as a normal paint issue.
The stain is on a textured ceiling
Matching ceiling texture can be difficult, especially when repairs are needed before repainting.
You are not sure if the leak source was fixed
Painting before confirming that the issue is resolved can waste time and money.
In all of these cases, a pro can help determine whether the right solution is patching, replacing, sealing, repainting, or some combination of all four.
Why Ceiling Repairs Often Look Simpler Than They Really Are
Ceilings seem flat and simple.
But repairs there are often more noticeable than repairs on walls.
People naturally look across a ceiling and expect a uniform finish. Even minor texture changes, roller marks, patch outlines, or sheen differences can be clearly visible, especially in rooms with strong natural light or overhead fixtures.
That is why painting over a water stain is not only about hiding a mark.
It is about restoring a broad visible surface.
If the repaired area is not sanded well, primed properly, or blended carefully, the stain may disappear, but the patch may still stand out. This is one reason many homeowners try the project once, then call for help later when the ceiling still does not look right.
Knowing how to paint over water stains on ceilings involves understanding that ceilings are unforgiving.
A repair has to look clean from multiple angles.
Common Mistakes to Avoid
If you want a cleaner and longer-lasting result, avoid these common mistakes:
Painting before fixing the leak
This is the most common issue. If the moisture source persists, the stain will usually return.
Skipping dry time
Even slightly damp material can create adhesion and finish problems.
Using paint without stain-blocking primer
Regular paint alone often fails to stop stain bleed.
Ignoring surface damage
Soft drywall, peeling layers, and sagging sections may need repair before painting.
Painting only a tiny patch
A small touch-up can leave an obvious visual mismatch on the ceiling.
Rushing the finish
Ceiling work often needs patience to look even and natural.
These mistakes are exactly why so many homeowners search for how to paint over water stains on the ceiling after a first attempt fails.
The process matters as much as the product.
What a Professional Usually Does Differently
A professional approach often looks more organized from the start.
Instead of jumping straight to paint, the process usually begins with evaluation.
Is the leak active?
Is the material damaged?
Does the surface need repair?
Will the stain need specialized sealing?
Should the entire ceiling be painted to blend?
Those decisions help shape the final result.
A professional is also more likely to spot issues that a homeowner may overlook, such as subtle drywall movement, uneven texture, repeated moisture patterns, or the need for broader repainting to keep the ceiling looking uniform.
That does not mean every stain requires professional service.
But it does mean that the bigger or more uncertain the problem is, the more valuable that experience becomes.
If you want to know how to paint over water stains on ceiling surfaces the right way, the answer is not simply to roll fresh paint over the mark and hope for the best.
The right process starts earlier.
You need to identify the source of the stain, ensure the ceiling is fully dry, check that the material is still sound, clean the area, seal it with a stain-blocking primer, and then repaint to blend the finish properly.
That is the path to a result that looks better and lasts longer.
At the same time, not every water stain is just a paint issue. Some stains point to active leaks, damaged drywall, or deeper repair needs that should be addressed before any finish work begins.
The key is knowing the difference.
A small, dry, stable stain may be manageable.
A recurring or damaged area is a sign to bring in help.
When you handle the problem at the right level, the repair has a much better chance of staying fixed.
Covering ceiling water stains the right way starts with fixing the source, sealing the damage, and using the proper paint products for a clean, lasting finish. But when stains keep returning or damage spreads, professional help matters. Cooley Brothers Painting provides expert solutions that restore your ceiling and protect your home with confidence.
FAQs
1. Can I paint directly over a ceiling water stain?
Usually no. A water stain should not be painted directly with regular ceiling paint. The moisture source must be fixed first, and the stain should be sealed with a stain-blocking primer before repainting.
2. Why does a water stain come back through fresh paint?
This usually happens when the stain was not sealed properly or when the leak or moisture issue was still active. Regular paint often does not prevent water-stain bleeding.
3. Do I need to repaint the whole ceiling or just the stained spot?
A small spot can sometimes be treated alone, but painting the full ceiling often gives a better visual result because it helps blend color and sheen more evenly.
4. How do I know if the ceiling is too damaged to just paint?
If the ceiling is soft, sagging, bubbling, cracked, or peeling, it may need repair before painting. These signs often mean the water affected the material itself.
5. When should I call a professional for a ceiling water stain?
You should call a professional if the stain keeps returning, the source of the leak is unclear, the ceiling is damaged, the affected area is large, or there are signs of mold, odor, or recurring moisture.

David Cooley, the esteemed owner of Cooley Brothers Painting, has established himself as a leading figure in the painting industry. With a rich history of delivering unparalleled service in Torrance, Manhattan Beach, Palos Verdes Estates, Redondo Beach, and Rolling Hills, his hands-on approach and dedication to quality have shaped Cooley Brothers Painting into a trusted name for exceptional painting services. With a focus on innovation, customer satisfaction, and community engagement, David’s leadership continues guiding his team toward new heights of excellence and reliability in every project.