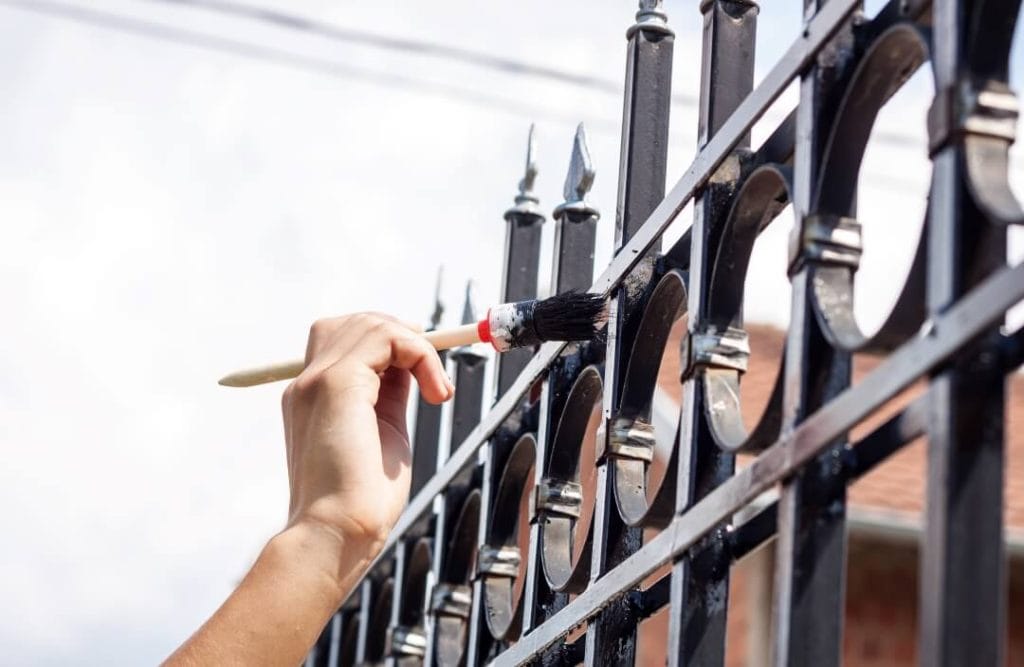
Railings and gates require careful preparation before painting. As a house painter in Rolling Hills Estates, CA, you should remove rust and loose paint and test for lead-based coatings to protect your household. Use wire brushing and sanding, and apply rust converter where needed. Wear a NIOSH-rated respirator and eye protection when using power tools. Proper primer and paint provide a durable, long-lasting finish that resists corrosion and improves curb appeal.
Key Takeaways:
- Thoroughly remove rust and flaking paint using wire brushing, sanding, or media blasting, then clean the surface with a degreaser before coating.
- Repair dents, cracks, and loose welds; fill and sand smooth to ensure an even surface and proper adhesion.
- Use a rust-inhibiting metal primer and a high-quality exterior metal paint, applying multiple thin coats and allowing the recommended dry times for long-lasting protection.
Essential Tools and Materials for Wrought Iron Preparation
Stock a mix of abrasive and chemical supplies, including 80–120 grit sandpaper for rust removal and 150–220 grit for smoothing, as well as medium and stiff wire brushes. Also, stock an angle grinder with a wire cup for heavy corrosion, a rust converter, and a zinc-rich or epoxy metal primer. Bring exterior alkyd or acrylic-urethane topcoat, masking tape, drop cloths, nitrile gloves, eye protection, and a NIOSH-rated P100 respirator if sanding or suspecting old lead paint. Lead hazards require EPA lead-safe work practices and testing before proceeding.
Must-Have Tools for DIY House Painters
Keep an angle grinder (“.5” with wire cup), an orbital sander, a set of hand wire brushes, a needle scaler or oscillating multi-tool for tight areas, sanding blocks with 80–220 grit, quality brushes (“–2” angled and “3” trim), and a pressure washer (1200–2000 PSI) for wash-down. Use a respirator and gloves; power tools can throw sparks and metal shards, so wearing goggles and leather gloves can dramatically reduce the risk of injury. Plan for 1–2 hours per 10 linear feet of railing for full prep on average.
Choosing the Right Paint and Primer
Pair a rust-inhibiting primer with a durable topcoat, such as epoxy or zinc-phosphate/zinc-rich primers, for maximum corrosion resistance. Follow this with oil-based alkyd enamel or exterior acrylic-urethane for UV and weather durability. Target a two-coat system (1 primer, two topcoats). One gallon covers ~350–400 sq ft, and expect dry times of roughly 2–4 hours for acrylics and 24–48 hours for alkyds between coats. Avoid mixing water-based primers under oil topcoats to prevent adhesion failures.
Match chemistry: use oil/alkyd primer under oil-based topcoats and epoxy primers under polyurethanes or alkyds designed for metal. If your property is located within ~5 miles of the coast, consider upgrading to high-solids or marine-grade epoxy primer and a polyurethane topcoat for enhanced salt-air resistance. Examples that pros use: Sherwin-Williams Macropoxy 5580 primer or Rust-Oleum Professional High Performance enamel topcoat; test a small “6” x6″ area and check adhesion after 24–48 hours before recoating the entire piece.
Step-by-Step Process for Preparing Wrought Iron Gates
Step-by-Step Checklist
| Step | Action |
|---|---|
| Inspect | Scan for rust, loose welds, old paint layers, and indicators of lead paint. |
| Remove Hardware | Remove hinges, latches, and fasteners; label the parts and bag the small pieces. |
| Clean | Degrease with TSP or citrus cleaner, pressure-wash 1,200–2,000 psi for heavy grime. |
| Rust Removal | Wire-brush, angle-grind with a cup brush, or media-blast to a bright metal finish. |
| Sanding/Stripping | Use 80–120 grit for heavy build-up, and a chemical stripper for tight details if needed. |
| Prime & Paint | Apply a rust-inhibiting primer (zinc-rich or epoxy), then two topcoats of exterior paint. |
Cleaning: Techniques for Optimal Results
Start by degreasing with a TSP solution or a citrus-based cleaner at the manufacturer’s recommended ratios, then scrub with a stiff nylon brush to reach crevices. For heavily soiled gates, use a pressure washer set to between 1,200 and 2,000 psi, holding it 12–18 inches away. Wear chemical-resistant gloves and eye protection, and bag runoff if you suspect lead paint to prevent contamination.
Sanding and Stripping: How to Remove Old Paint
Begin with a wire brush or 80-grit disk to remove flaking paint and surface rust, then progress to 120–150-grit to smooth the edges. For intricate scrollwork, apply a professional-grade stripper and work with nylon scrapers; avoid high-heat methods that can emit hazardous fumes. Use a NIOSH-rated respirator, gloves, and eye protection, and contain chips for proper disposal if lead is present.
For stubborn coatings, media blasting with soda or crushed walnut at 30–60 psi restores detail without excessive substrate loss; choose crushed glass or steel-shot only for heavy industrial work. Handheld grinders with a “–3” cup brush at moderate speed remove thick rust fast, but produce sparks—keep a fire extinguisher nearby. Test-strip a small area first, and if you suspect lead, perform a certified test and follow local abatement rules.
Surface Treatment: Protecting Against Rust and Corrosion
After mechanical cleaning, focus on long-term protection: hot-dip galvanizing can last 20–50 years in benign environments, while zinc-rich epoxy primers give cathodic protection for welded or repaired areas. You should aim for a total dry film thickness (DFT) of roughly 4–8 mils before topcoating, keep the metal free of salts (rinse with deionized water), and avoid coating if ambient humidity exceeds 85% or surface temperature is within 5°C of the dew point.
Importance of Rust Inhibitors in Coastal Areas
Salt-laden air near Rolling Hills Estates accelerates corrosion, so you want inhibitors that neutralize chloride attack and block underfilm corrosion. Choose zinc-rich epoxy primers or zinc-phosphate pigments that provide both barrier and galvanic protection. These products are standard for marine-exposed steel and substantially reduce red rust formation during ASTM B117 salt-spray exposure compared to generic primers.
Applying a Protective Coating: Best Practices
Start with SSPC-SP or equivalent cleanliness, then apply primer in thin, even coats—typically two coats at 2–3 mils each (total 4–6 mils)—allowing the manufacturer’s recoat window. Maintain 10–30°C ambient temperature, avoid painting in direct wind or sun that causes flash drying, and use a final polyurethane or fluoropolymer topcoat of 2–3 mils for UV and chemical resistance.
Sequence the system: spot-galvanize welds, apply a zinc-rich epoxy primer, then an epoxy intermediate if heavy chemical or abrasion exposure is expected, and finish with a polyurethane topcoat. For repairs, abrade the feathered edges to 320–400 grit, wipe with solvent, and stripe coat the cut edges. Perform holiday testing or a borescope inspection on hollow rails to verify full coverage in cavities.
Painting Techniques for a Flawless Finish
You should use a layered system: remove loose rust with 80–120 grit, treat bare metal with a rust inhibitor, then apply one coat of oil-based primer and a high-build enamel topcoat. Allow 4–6 hours between coats at 65–75°F and maintain a humidity level below 70% to prevent orange peel. Focus on welds and inside corners, where flaking rust is most concentrated.
Brush vs. Spray: Which Method Is Most Effective?
You can spray ornate gates for speed—hold the gun 10–12 inches away and use a 1.0–1.3 mm tip for fine atomization—then back-brush to blend. For railing, you’ll prefer a “.5” angled sash brush to force paint into crevices and minimize overspray. Combining both methods often yields the fastest and most consistent results.
Achieving Even Coverage: Tips and Tricks
Apply thin, overlapping passes and maintain a wet edge to prevent lap marks. Target two coats, aiming for a wet-film thickness of approximately 2–3 mil per coat. Sand between coats with 220-grit and back-brush sprayed areas to blend; watch for runs—drips require sanding and recoat to restore a smooth finish.
- wrought iron prep
- rust inhibitor
- oil-based primer
- two-coat system
This checklist reduces callbacks and extends the finish life by years when you follow recommended cure times.
You should measure the wet film with a comb gauge, aiming for 2–3 mils per coat, and let each coat cure tack-free—typically 4–6 hours at 70°F. Use cross-coating: spray horizontally, vertically, and finish by brushing in the same direction to blend gloss. Choose synthetic brushes for waterborne paints and natural bristles for solvent-based systems; avoid painting in environments with humidity above 70% to prevent blistering.
- wet-film thickness
- cross-coating
- 220-grit sanding
- HVLP spray
This protocol minimizes runs, controls film build, and produces an even gloss across intricate pickets and rails.
Expert Insights: Common Pitfalls and How to Avoid Them
Frequent mistakes we’ll see are incomplete rust removal, painting over oil or grease, and using ordinary latex where a rust-inhibitive primer is needed; any remaining pitting can cause coating failure within 6–12 months. Opt for wire brushing to brighten metal or use media blasting for heavy corrosion, then wipe with a high-strength degreaser. Use a zinc-rich or epoxy primer under a durable topcoat, and test adhesion on a small section before committing to the whole gate.
Timing Your Project: The Impact of Weather Conditions
Plan work for dry days with ambient temperatures between about 50–85°F and relative humidity under 70%; many oil-based primers require this window to flash off and cure. Avoid the early-morning marine layer in Rolling Hills Estates—schedule your visit for mid-morning to mid-afternoon when the dew has lifted. Check tpaint’s dew point requirement (the surface should be at least 5°F above the dew point) and postpone if gusty winds will blow dust onto wet coatings.
Post-Painting Care: Ensuring Longevity of Your Finish
Allow coatings to reach a tack-free state (typically 24 hours) and a full cure (commonly 7–30 days) before heavy use. Wash the coating yearly with a mild detergent and a soft brush to remove salt and grime. Inspect for chips and rust every 6–12 months and perform touch-ups promptly—small nicks left untreated invite rapid corrosion.
For durable upkeep, conduct a spring and fall maintenance routine: month-to-month visual checks, an annual gentle wash, and targeted spot repairs as needed. When you touch up, sand out to solid metal with 80–120 grit to feather the edges, clean with solvent, apply a thin coat of rust-inhibitive primer, and then follow with two light topcoats that match the original system; this method prevents layer delamination. Consider applying a paste wax or automotive sealant twice yearly on horizontal rails to repel moisture—this can extend repaint intervals to 8–12 years or longer. For large gates or historic finishes, document coating system and colors, and hire contractors who can provide spray records and material data sheets so you can track performance over time.
Final Words
Summing up, you should follow a methodical preparation process to strip rust, clean, sand, apply a rust-inhibiting primer, mask surrounding areas, and choose durable exterior paint so that your Rolling Hills Estates, CA house painters deliver long-lasting results on wrought iron railings and gates. Proper safety and inspection before painting will protect your investment.
FAQ
Q: What are the step-by-step surface-preparation tasks for painting wrought iron railings and gates in Rolling Hills Estates, CA?
A: Inspect for loose paint, heavy rust, cracks, and structural damage. Remove loose paint and oxidation with a wire brush, sanding, or an angle grinder equipped with a wire wheel. Use media blasting for severely corroded pieces when practical. Treat the remaining rust with a rust converter or abrade it to a bright metal finish for optimal adhesion. Degrease and wash surfaces with a TSP substitute or trisodium phosphate solution, rinse thoroughly, and allow to dry completely. Repair cracks or holes by welding or using metal filler, then grind the area smooth and re-clean the repair site. Mask surrounding surfaces, apply a suitable metal primer, and follow with a compatible exterior topcoat once the primer has cured.
Q: How should I remove old paint and rust safely and effectively?
A: For light rust and peeling paint, use manual wire brushing and sanding; for heavier corrosion, consider power tools (angle grinder with wire wheel or flap disc) or professional blasting services (sand, soda, or bead) to reach bare metal. Chemical paint strippers can remove multiple layers, but they require proper ventilation, gloves, and eye protection. Choose low-VOC or citrus-based formulas when possible. Test for lead-based paint on older work. If lead is present, follow lead-safe work practices or hire licensed abatement contractors. Always use PPE (respirator, gloves, and eye protection) and contain and dispose of debris and rinse water in accordance with local regulations.
Q: Which primers and topcoats provide the best corrosion protection for coastal Southern California conditions?
A: Use a rust-inhibiting metal primer such as zinc-phosphate, epoxy, or etch-type primers formulated for ferrous metal; for high-salt environments, select a primer with proven salt-spray resistance. Topcoats should be durable exterior enamels or acrylic polyurethane coatings formulated for metal — 100% acrylic or polyurethane enamels deliver good UV and moisture resistance. For maximum longevity, a two-coat system (high-quality primer plus topcoat) or a three-coat professional system (etch primer → epoxy primer → polyurethane finish) is recommended. Choose coatings rated for exterior metal and follow the manufacturer’s recoat windows and surface-temperature limits during application.
Q: Can a homeowner tackle this project, or is professional help recommended?
A: Homeowners can complete small, simple jobs if they have the right tools, safety gear, and time for thorough prep and curing; typical DIY limitations include access to elevated railings, confined spaces, extensive corrosion, welding needs, and proper application of specialty primers or high-performance topcoats. Hire professionals when structural repairs, blasting, lead-based paint remediation, or premium corrosion-resistant coatings are required, or when you need durable, warranty-backed results in a coastal environment where salt accelerates failure.
Q: How long will a properly prepared and painted wrought iron railing last, and what maintenance keeps it in good condition?
A: With thorough surface preparation and quality coatings, expect 5–15 years of protection depending on exposure, coating system, and local salt spray. Annual inspections are crucial: wash railings with a mild detergent, rinse, and inspect for early signs of rust or coating failure. Quickly sand and touch up small chips or blisters with primer and topcoat to prevent spread. Replace corroded fasteners with stainless steel, repair welds as needed, and plan for a full recoat when widespread adhesion loss or heavy corrosion appears.

David Cooley, the esteemed owner of Cooley Brothers Painting, has established himself as a leading figure in the painting industry. With a rich history of delivering unparalleled service in Torrance, Manhattan Beach, Palos Verdes Estates, Redondo Beach, and Rolling Hills, his hands-on approach and dedication to quality have shaped Cooley Brothers Painting into a trusted name for exceptional painting services. With a focus on innovation, customer satisfaction, and community engagement, David’s leadership continues guiding his team toward new heights of excellence and reliability in every project.