Want that sleek, piano-style glow on a tabletop, vanity, or set of cabinets? Lacquer is the classic path to a hard, smooth, quick-dry finish that buffs to a rich sheen. In this guide, we’ll walk you through how to apply lacquer to wood with a step-by-step process you can follow at home—covering prep, sealing, brushing vs. spraying, sanding between coats, and a practical polishing routine. You’ll also get tool checklists, dry-time cues, and troubleshooting so your first pass looks confident and clean.
(Related read for more pro pointers: how to apply lacquer to wood — low-mess techniques and workflow tips.)
What lacquer actually is (and why it looks so good)
Lacquer is a fast-curing, solvent-borne finish that forms a thin, even film with each pass. It re-melts into itself between coats, so layers knit together rather than stacking like sheets. That chemistry is why:
- It levels nicely and hides small brush/roller marks.
- It dries quickly, allowing you to apply multiple coats in a day.
- It polishes to a finish ranging from a soft satin glow to a deep, mirror-like gloss.
Common types you’ll encounter
- Nitrocellulose lacquer: The classic look—great clarity and warm tone.
- Acrylic lacquer: Non-yellowing, good for light woods and painted pieces.
- Pre-cat / conversion lacquer: Catalyzed systems for higher durability; often sprayed and best with a clear system plan (pot life, recoat windows).
Whichever you choose, read the label for reducer type, recoat window, and sanding guidance. Little rules here matter.
Safety first: protect your lungs, eyes, and space
Lacquer solvents flash quickly and have strong odors. Work smart:
- Ventilate with cross-flow air (intake + exhaust). Avoid open flames.
- Wear a NIOSH-rated respirator for organic vapors; add safety glasses and nitrile gloves.
- Use spark-free fans and switch off gas appliances nearby.
- Keep rags and strainers in a metal can with a lid; dispose of them in accordance with local rules.
Tools and materials checklist
- Lacquer (your chosen system) and compatible thinner/reducer
- Sanding blocks and paper: 150, 180, 220, 320, 400 grits
- Tack cloths or a lint-free microfiber
- Dewaxed shellac or dedicated sanding sealer (if your system calls for it)
- High-quality natural-bristle brush (for brushing lacquer) or an HVLP/airless setup (for spraying), plus filters
- Strainers (paint cones or fine mesh)
- Clean mixing/measuring containers and a stirring stick
- Drop cloths, painter’s pyramids or stands, and masking supplies
- Optional: grain filler for ultra-flat tabletops; polishing compounds and foam pads if aiming for high gloss
Step 1: Evaluate the wood (and old finish)
Look closely at species and surface condition.
- Open-grain woods (oak, mahogany): You’ll feel pores. Consider a grain filler if you want a perfectly flat, glassy top.
- Closed-grain woods (maple, cherry): Already smooth; skip filler.
- Existing finish? Wipe with denatured alcohol (shellac softens) and lacquer thinner (old lacquer will get tacky). If it’s a thick poly/varnish, you’ll likely need to strip or sand to bare wood for best adhesion.
Aim for a clean, sound surface before moving on.
Step 2: Sand for a level starting point
Sanding sets the stage for clarity and smoothness.
- Flatten with 150–180 grit to remove mill marks and unevenness.
- Refine to 220 grit for most woods (stop at 180 on open-grain if you’ll use filler).
- Vacuum thoroughly, then wipe with a slightly damp microfiber.
- Final dust check: Side-light the surface with a flashlight or a raking light; dust and scratches become visible.
Tip: Don’t over-polish raw wood. Going too fine can burnish the surface and reduce sealer bite.
Step 3: Seal the wood (why this step matters)
Sealer keeps your first lacquer coat from sinking unevenly and helps everything sand flat.
- Dewaxed shellac (1–1.5 lb cut) is a friendly universal sealer. It dries quickly, sands easily, and works well under most lacquers.
- Lacquer sanding sealer (from the same brand line) is designed to build quickly and sand to a powder finish.
Apply a thin, even coat. Let it dry per label (usually 30–60 minutes). Sand lightly with 220–320 until the surface feels uniformly smooth—no shiny low spots. Vacuum and tack.
Step 4: Decide—brush or spray?
You can achieve great results either way. Choose based on piece size, ventilation, and your comfort.
Brushing lacquer: controlled, low-gear approach
- Use a high-quality natural-bristle brush.
- Thin the first coat about 10–20% (check label) to improve flow.
- Load the brush modestly and keep a wet edge.
- Lay each stroke in one pass, then tip off lightly with the ends of the bristles to remove small ridges.
- Avoid going back over partially dried areas—lacquer grabs fast.
Brushing is suitable for small projects, face frames, and touch-ups. It takes a little longer to build film thickness, but it’s calmer for beginners.
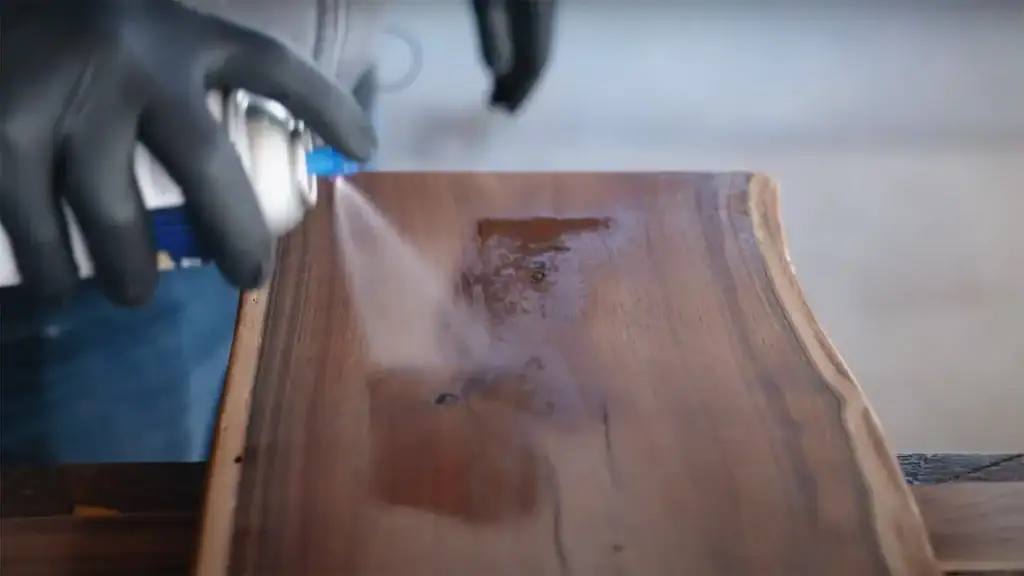
Spraying lacquer: fast build, pro look
- HVLP with a 1.3–1.5mm needle/nozzle is a common starting point for thin lacquers; adjust as needed for your product.
- Strain the finish, then test viscosity to achieve smooth atomization with minimal orange peel. Reduce per label in small increments.
- Hold the gun 6–8 inches from the surface. Keep it square and move at a steady speed.
- Overlap each pass 50%. Start moving before you pull the trigger and release after you pass the edge to avoid spit.
- Spray horizontal pieces flat whenever possible—gravity helps level and reduces runs.
Spraying is perfect for cabinet doors, tabletops, and batches of parts. The key is good light and a clean airflow plan.
Step 5: First coat (the “mapper” coat)
Think of the first coat as your map—showing where pores remain and where you’ll need extra care.
- Apply a thin, uniform coat.
- Watch for dry spray (dusty feel) on edges—usually a distance or reducer issue; move slightly closer or adjust reduction.
- Let it dry fully (typically 30–45 minutes for brushing; faster for spraying; product-dependent).
Lightly sand with 320 to knock down nibs. You’re not trying to flatten the world yet—just make the surface feel even. Vacuum and tack.
Step 6: Build coats (2–4 passes)
Add two to three more coats, adjusting as you go.
- Coat thickness: Aim for thin to moderate. Heavy coats trap solvent, which can cause blushing or running.
- Directions: Alternate spray/brush directions with each coat for even coverage.
- Sanding between coats: Quick scuff with 320–400 to remove dust and minor texture. Sand until it feels uniformly silky; don’t break through edges.
- Defect patrol: If you get a run, let it cure. Level with a razor held almost flat, then sand through the grits before the next coat.
Building for satin? Stop when the surface feels consistently smooth, and you’ve got full coverage.
Building for high gloss? Add an extra coat or two to achieve the film thickness needed to level and polish later.
Step 7: Final leveling and sheen control
After your last coat cures to the time recommended on the can (often overnight for brushing systems; catalyzed systems may have specific windows), choose your finish path:
Satin or matte
- Rub out with gray/white non-woven pads and a drop of mineral spirits or soapy water.
- Work with the grain, then finish with light, uniform strokes.
- The result: a soft, even glow that hides tiny surface flaws.
Semi-gloss to high gloss
- Level: Wet sand with 600 → 800 → 1000 (then 1500/2000 for deep gloss). Keep the surface wet and a rubber block flat. Stop as soon as the orange peel disappears.
- Polish: Use a fine compound on a foam pad at low speed, then a finishing polish. Keep pads clean; heat is the enemy.
- Inspect under cross-light. If a faint haze persists, a second pass with finishing polish usually clears it.
Troubleshooting: quick fixes for common issues
- Orange peel (bumpy texture): Finish too thick, gun too far, or moving too fast. Add a touch of reducer, move closer, slow your pass, and overlap 50%.
- Blushing (milky cast): Humidity trapped in the film. Add a blush retarder or a small amount of slower reducer; apply a light “flow” coat to re-melt and release moisture.
- Fish-eyes (craters): Surface contamination (silicone or oil). Clean aggressively with a solvent; consider a compatible fish-eye eliminator; and keep the environment silicone-free (avoid furniture polishes).
- Runs/sags: Too heavy or too slow on verticals. Let it cure. Level the run carefully with a sharp razor/scraper, then sand and recoat thinly.
- Dust nibs: Improve dust control by vacuuming before each coat, tacking thoroughly, and allowing the air to settle for a minute before spraying.
Special cases: stains, dyes, and color layers
- Stain under lacquer: Allow stain to dry completely. Wipe with a clean white rag; if color transfers, wait longer. Seal with shellac or sanding sealer before lacquer.
- Dye work: Dyes give vivid color but can re-wet. Consider a very light mist coat of lacquer first (“spray seal”) to lock color before your first full coat.
- Tinted/toner coats: You can tint lacquer slightly to even color across panels. Apply clear coats first, then a light toner, then clear coats again to protect the color layer.
Grain filling for ultra-flat tabletops
For mirror-flat finishes on open-grain woods:
- Sand to 180–220.
- Apply oil- or water-based grain filler, pushing it across the grain.
- Scrape/squeegee off excess; let it cure.
- Sand level and seal before lacquer build.
- Proceed with your normal coats and rub-out.
This step removes the tiny valleys that keep light from reflecting evenly.
Dry times, recoat windows, and cure
- Dry to the touch: typically 10–30 minutes, depending on the product and conditions.
- Recoat: Commonly 30–60 minutes for nitro/acrylic brushed or sprayed thin; catalyzed products follow manufacturer windows—respect them.
- Handle/use: Gentle use after 24–48 hours.
- Full cure: A week or more. Keep heavy objects and heat off the surface until then.
Temperature, airflow, and humidity shift these numbers, so trust the label and what you feel under your fingertips.
Maintenance: keep that glow
- Wipe with a soft, damp cloth; dry immediately.
- Avoid silicone polishes; they complicate future repairs.
- For light scratches, a swirl remover or a fine finishing polish often restores the shine.
- Use coasters and pads under hot or abrasive items.
Step-by-step recap (one-page checklist)
- Sand flat: 150/180 → 220; vacuum and tack
- Seal: dewaxed shellac or lacquer sanding sealer
- Choose method: brush (thin 10–20%) or spray (strain, test atomization)
- First coat thin; dry; scuff 320
- Build 2–3 coats, thin-to-moderate; scuff between with 320–400
- Level/polish to target sheen; clean and protect while curing
When to call a pro
Complex shapes, long runs of cabinet doors, and catalyzed systems with tight recoat windows require precise timing and a controlled environment. If you want that showroom-flat gloss on a dining table or built-ins, a professional spray setup can hit the mark in fewer sessions and less risk—especially if you need color-matching or a specific sheen across many pieces.
For more insights and workflow pointers from our team, see our related guide on how to apply lacquer to wood—it pairs well with the steps above: essential lacquer tips.
FAQs
1) Can I brush lacquer, or do I have to spray?
You can do either. Brushing is better suited to small projects; spraying applies faster and lays flatter on large, flat parts. Use natural-bristle brushes to brush lacquer, and strain the product in either direction.
2) Do I need a sanding sealer?
It helps. Sealers sand to a powder finish and provide a level base. Use dewaxed shellac or the manufacturer’s lacquer sealer for best compatibility.
3) How many coats should I apply?
Typically, 3–4 light coats for a durable finish. Add one or two more if you plan to level and polish to high gloss.
4) Why did my lacquer turn hazy (blushing)?
Moisture got trapped while solvents flashed. Add a small amount of retarder or slower reducer, then apply a light-flow coat to re-melt and release the moisture.
5) How long before I can use the piece?
It’s usually safe for gentle use after 24–48 hours, with full cure in about a week. Avoid heat, water, and heavy items until cured.

David Cooley, the esteemed owner of Cooley Brothers Painting, has established himself as a leading figure in the painting industry. With a rich history of delivering unparalleled service in Torrance, Manhattan Beach, Palos Verdes Estates, Redondo Beach, and Rolling Hills, his hands-on approach and dedication to quality have shaped Cooley Brothers Painting into a trusted name for exceptional painting services. With a focus on innovation, customer satisfaction, and community engagement, David’s leadership continues guiding his team toward new heights of excellence and reliability in every project.

